


 ™
™


Finishing Options for Metal 3D Printed Parts
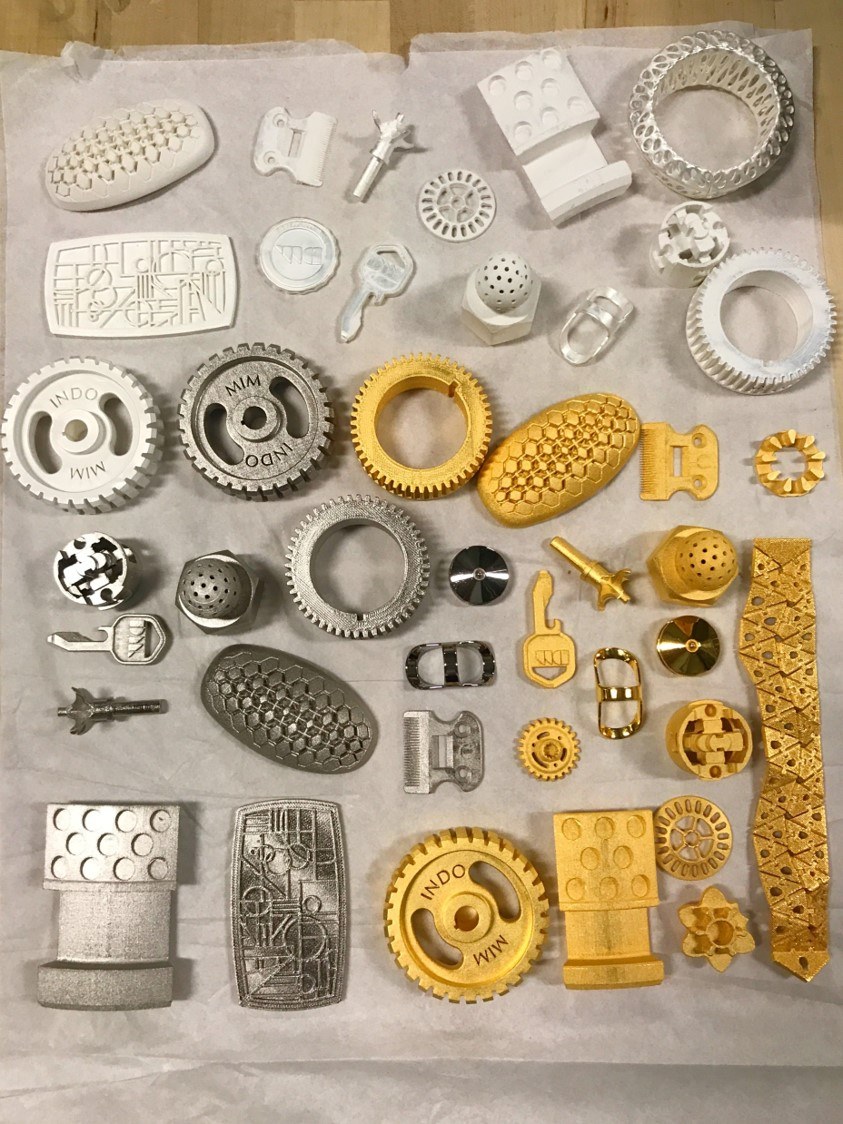
While many applications for metal 3D printed parts don’t require post processing, for those that do, the finishing options are vast.
Though the material properties of binder jet parts meet or exceed those of their traditionally-manufactured counterparts, there are some crucial ways in which they differ.
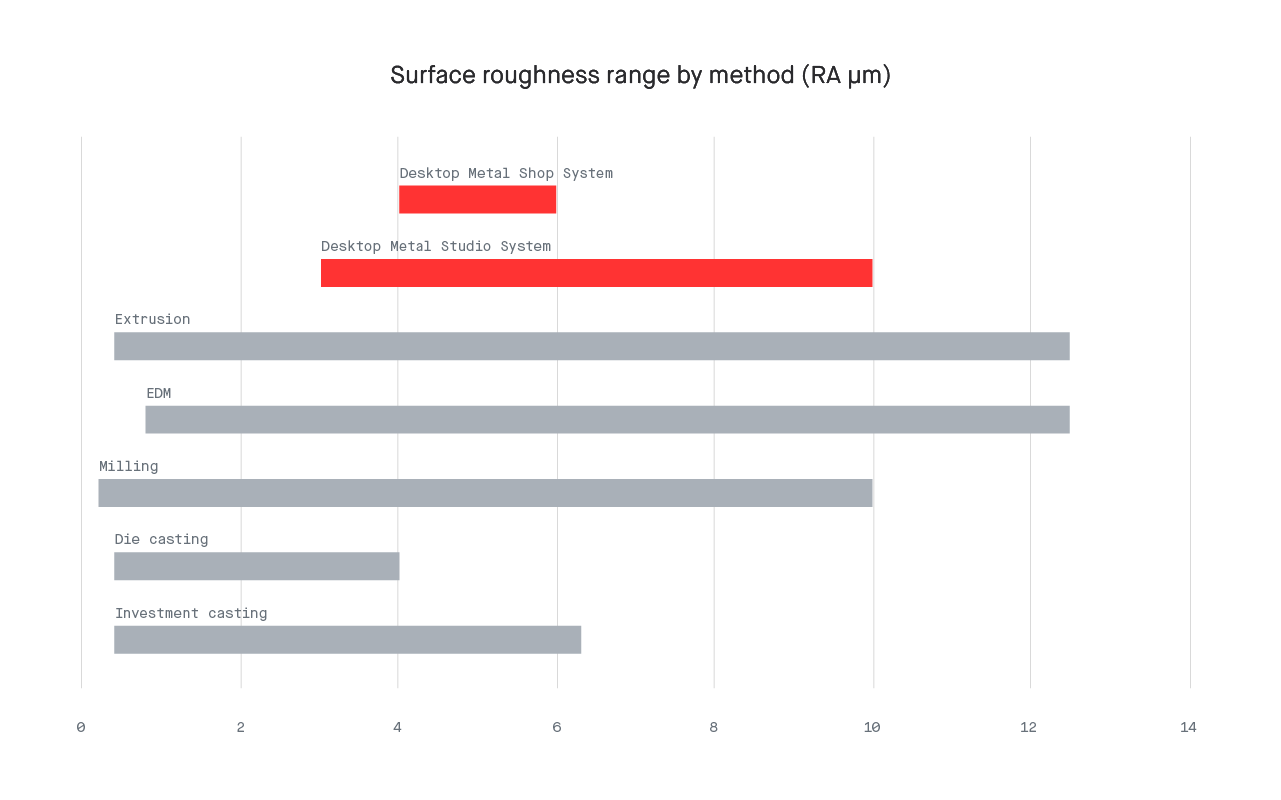
Depending on how they’re formed, 3D printed metal parts may show visible build layers, have sharp edges or burrs and will have significantly higher surface roughness than parts that are ground, milled or turned.
Aside from correcting those minor imperfections, there are a variety of reasons to post process parts, ranging from the need to ensure parts meet dimensional requirements to smoothing internal channels to increase flow rates to aesthetic considerations.
Green Sanding
An ideal solution for reducing the appearance of printed layer lines and other surface imperfections, especially for extrusion-based printing methods, green sanding takes place after parts are printed, when the metal powder is being held together only by polymer binders.
Since green parts are relatively soft - their consistency is equivalent to that of a crayon - a simple Scotch Brite pad can be used to smooth minor imperfections, like layer lines. More aggressive sanding can be done with sandpaper, while a detail razor can be used to clean up edges.
While they are far easier to work with than sintered metal parts, the soft consistency of green parts means care must be taken to avoid damaging them.
The benefits of green sanding, however, can be significant. Green sanded parts typically show between three and five times finer surface finish than unsanded parts. Depending on the application, sanded parts can show as much as a ten-fold reduction in post-processing time for finished metal parts.
Media Blasting
Media blasting uses compressed air to propel a blast media, such as alumina, stainless steel shot or glass beads, against the part to wear down the surface and produce a uniform matte or shiny finish.
An ideal solution for removing discoloration or blending in surface scratches and tool marks, media blasting will not alter the dimensional accuracy of parts,and can be performed in just minutes.
Adjusting the air pressure can also change how aggressive the blasting process is. Lower pressures can be used to simply change the surface color of a part, while using steel shot or glass beads at higher pressures may even deburr the surface.
Tumble Finishing
Tumble finishing refers to a group of processes in which low-energy, random-motion machinery is used in conjunction with media and abrasives to refine the surface of parts solely with mechanical methods.
While this approach can be used with both large and small parts, tumble finishing is best-suited for parts with relatively simple geometries.
When applied to more complex geometry, tumble finishing can result in non-uniform finishes.
Pin Finishing
A type of tumble finishing, pin finishing is ideal for low-cost processing of smaller parts.
The process uses powerful magnets to force a metallic media and parts to move in a circular motion. As the media and parts are agitated and move against one another, parts are deburred.
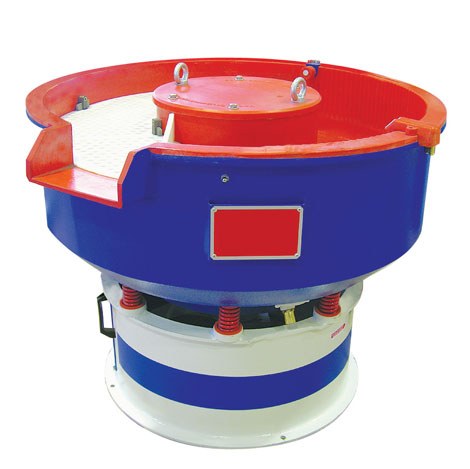
Vibratory Finishing
A batch finishing process typically applied to large numbers of relatively small parts, vibratory finishing involves placing parts in the tub of a vibratory tumbler with abrasive media of various shapes.
The vibratory action of the tub causes the media to rub against the parts, removing burrs and leaving them burnished, cleaned and brightened.
Depending on the application and the composition of the abrasive media, the process can be either wet or dry, and can be very gentle or very aggressive.
To allow operators to easily observe when the desired finish has been obtained, the process is typically performed in an open tub.
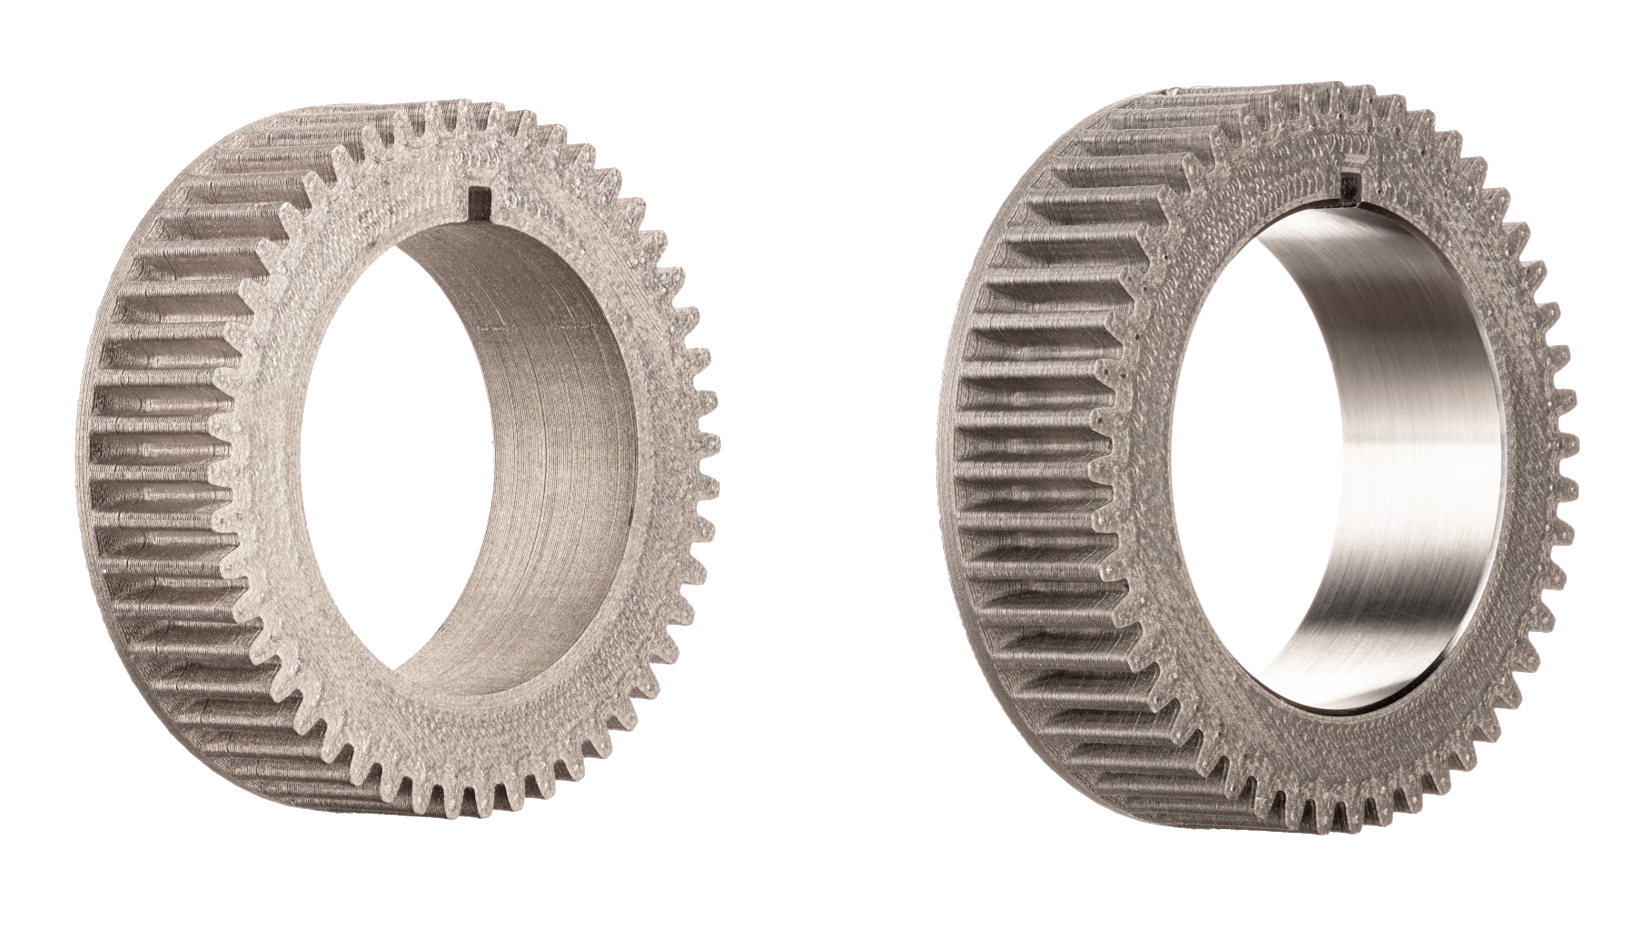
High Energy Finishing
A mass finishing technology that enables rapid finishing of smaller parts, high energy finishing features removal rates of up to ten times faster than vibratory finishing.
Typical approaches for high energy finishing include centrifugal disc systems, centrifugal barrel systems and drag finishers, which uses centrifugal force and mechanical advantage to dramatically reduce finishing times.
Typically, high energy finishing is used for applications where fast, high-volume throughput is needed, and in cases, like burnishing, cleaning, deburring, radiusing or blending, where it’s necessary to remove material from parts.
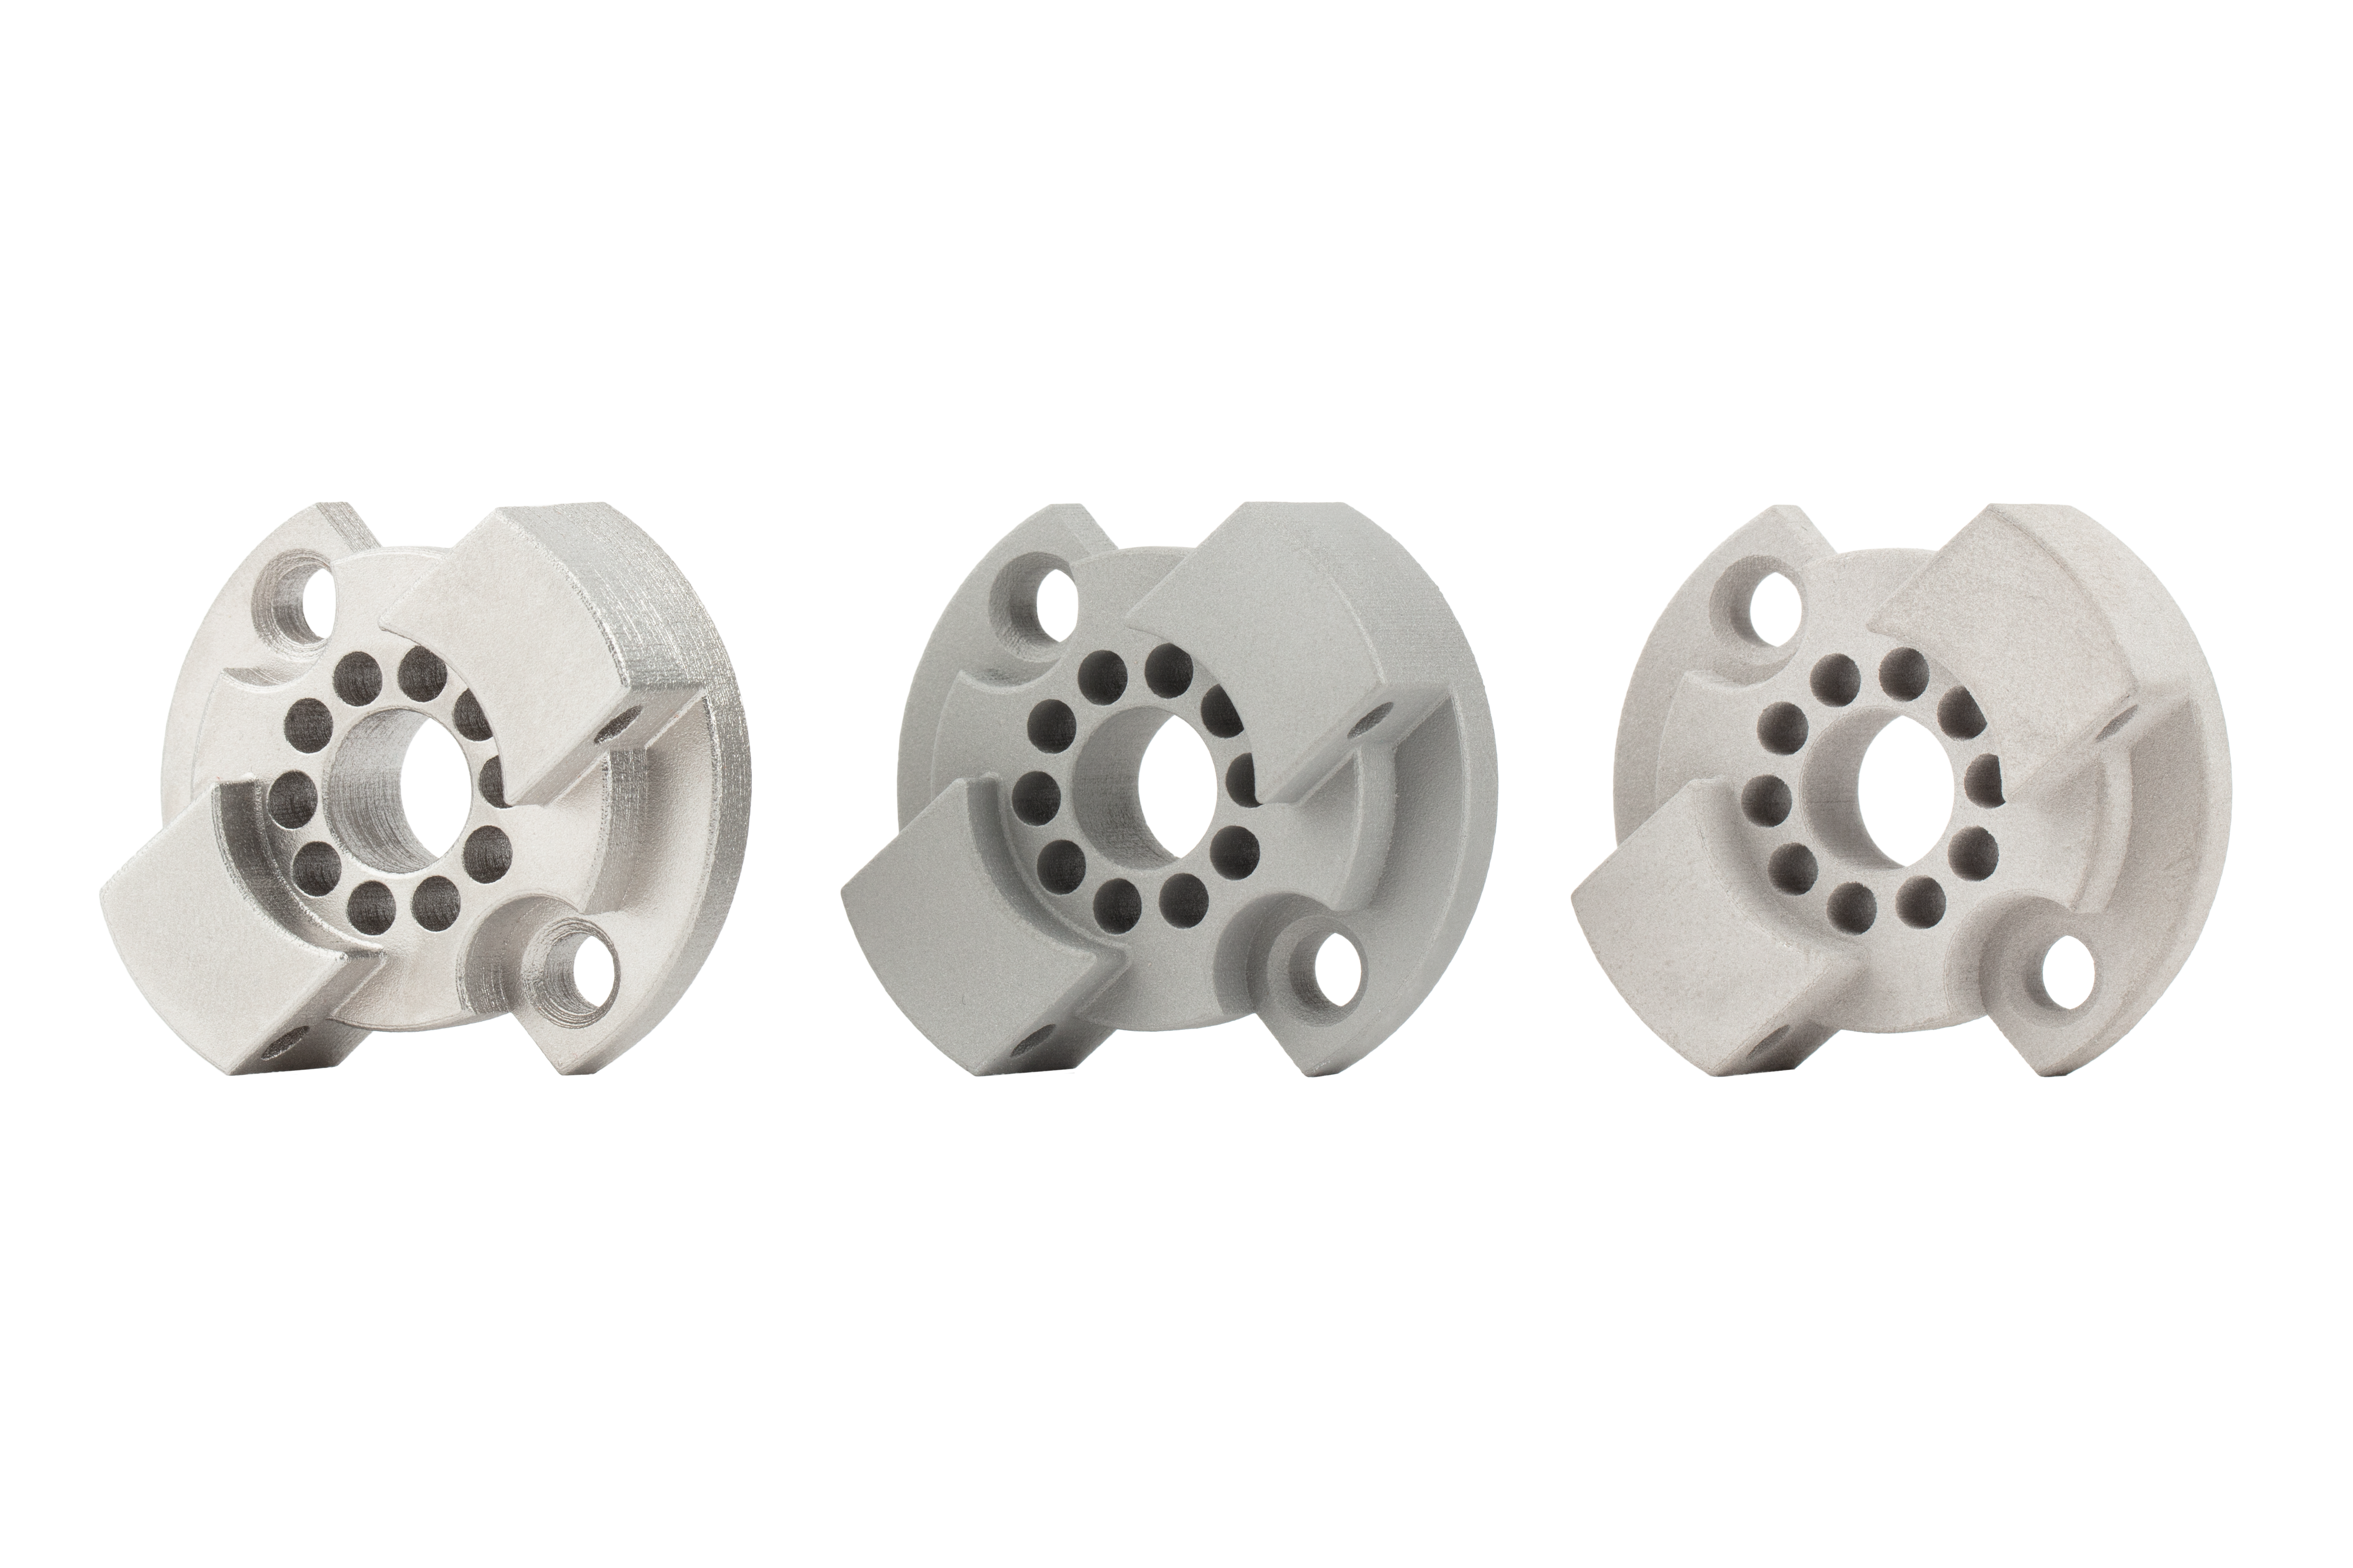
Centrifugal Disc Finishing examples
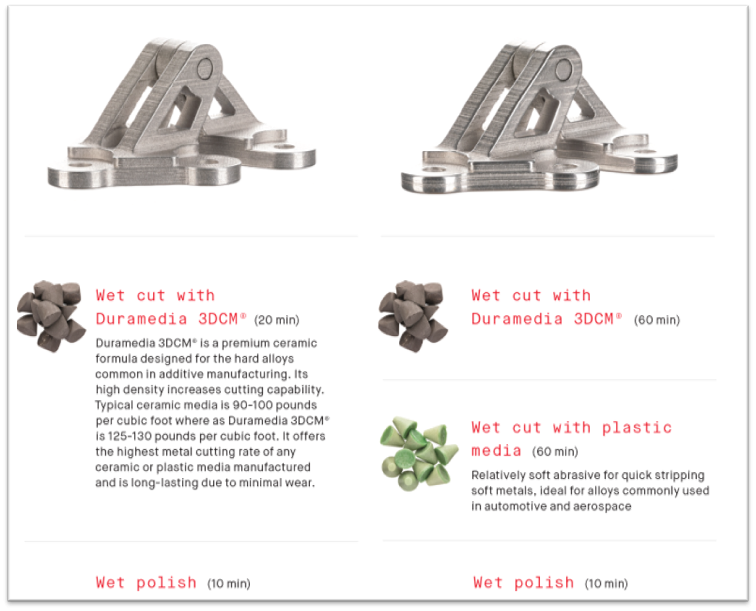
This hinge on the right underwent a three step process, which included a 60-minute wet cut with Duramedia, followed by a wet cut with plastic media and wet polish. While the part’s final finish is considerably smoother, it does show edge rounding. Manufacturers must consider those trade-offs when choosing a finishing method for metal 3D printed parts.
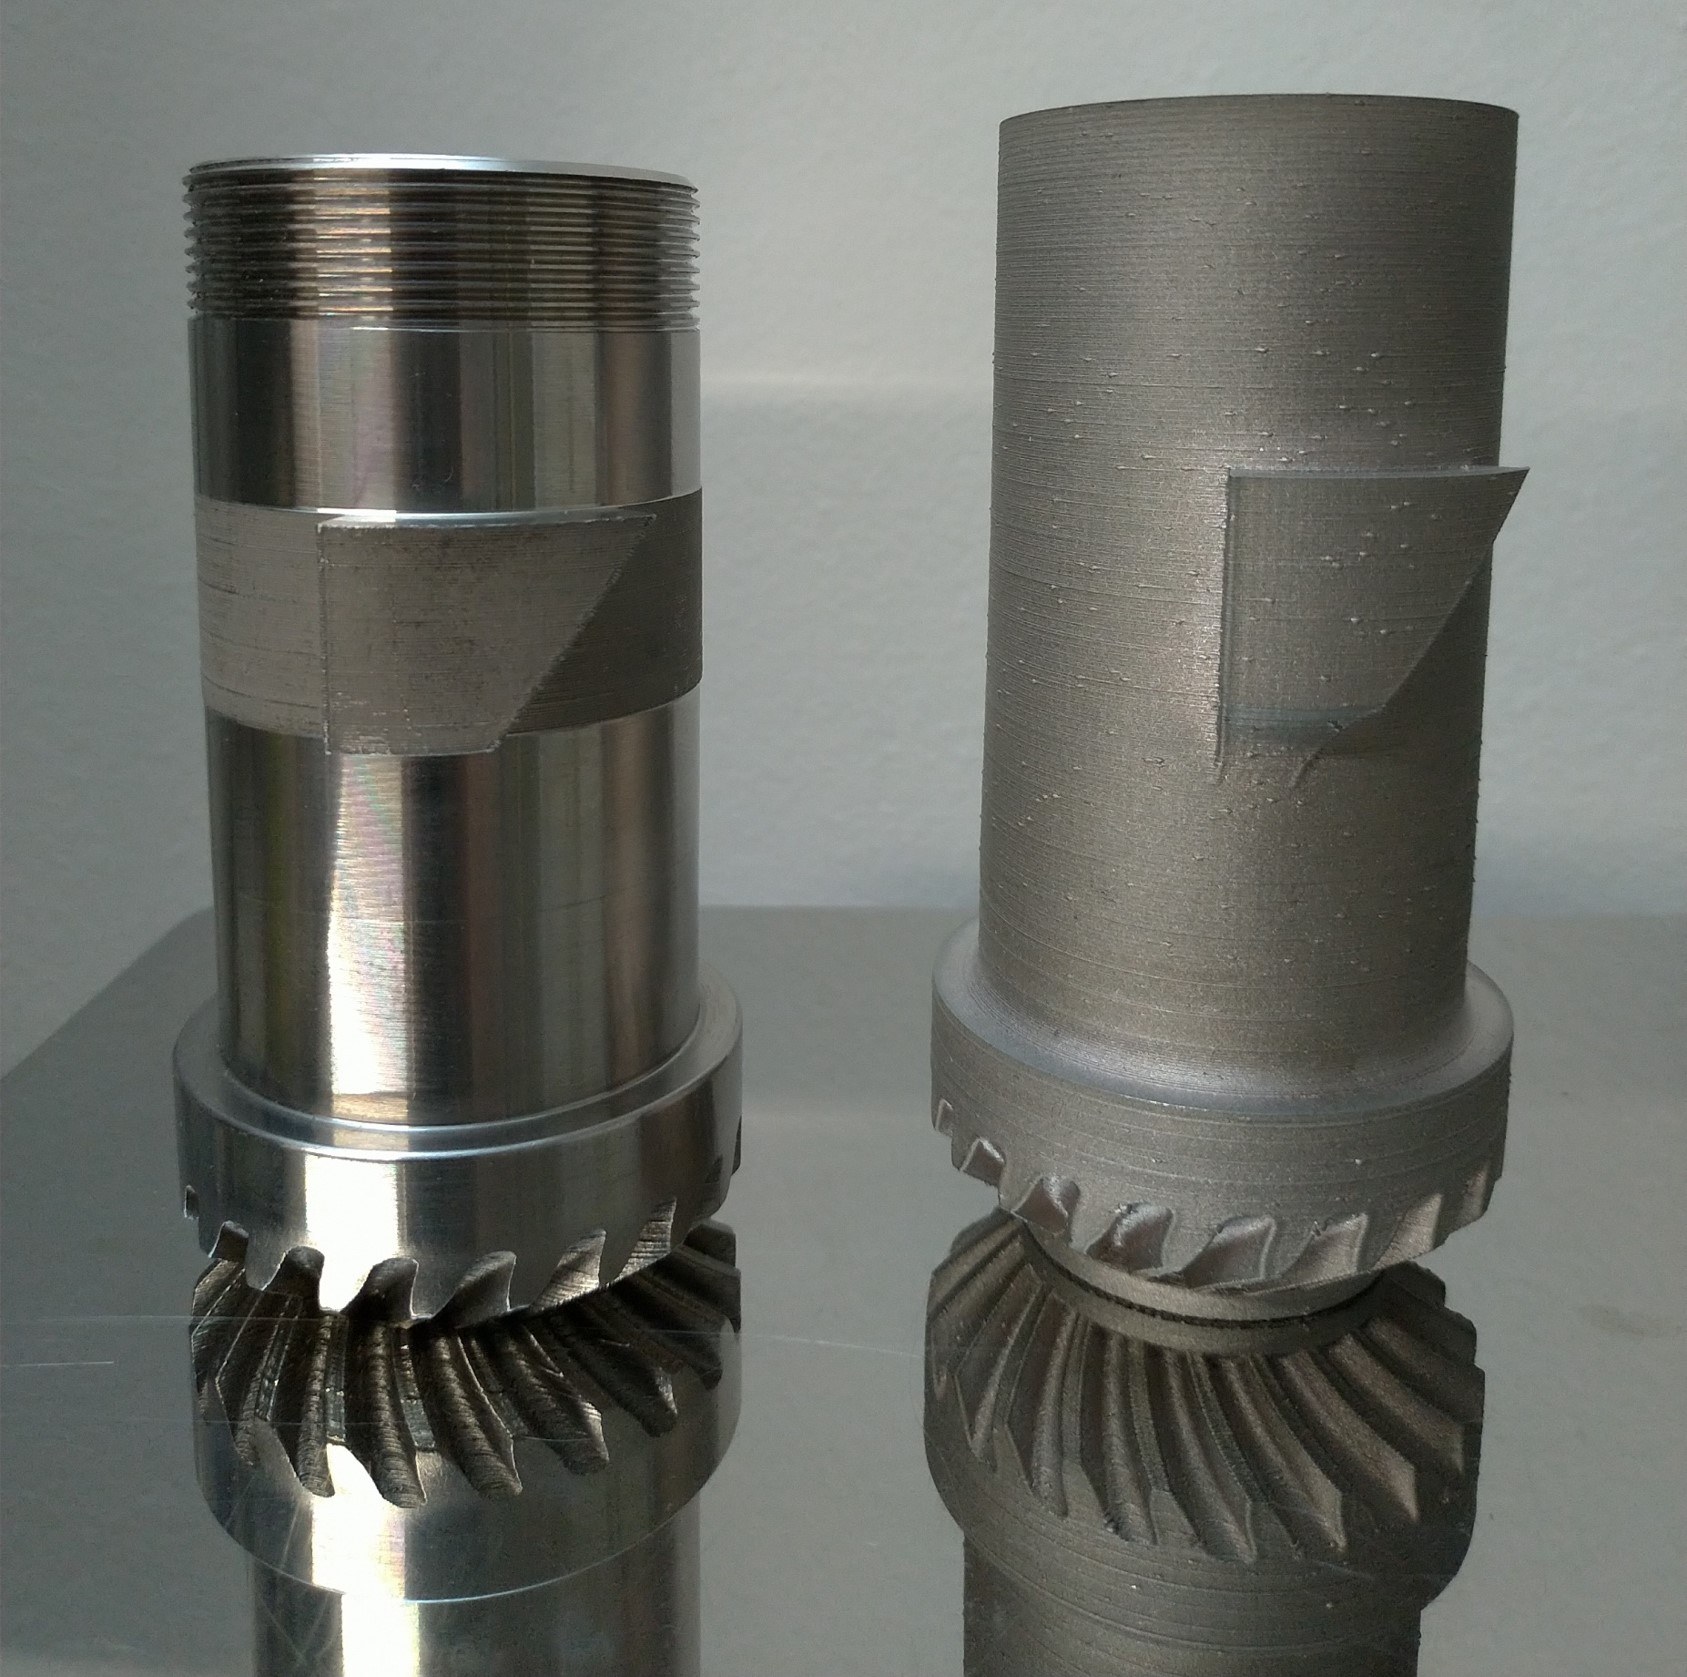
Isotropic Superfinishing
A finishing technique proprietary to REM Surface Engineering, isotropic superfinishing uses a combination of mechanical and chemical finishing to achieve a mirror-like finish on metal parts.
The process first uses a chemical solution to produce a self-assembled monolayer - essentially a softened metal layer on the surface of a part. That layer is then removed with a relatively gentle vibratotry finishing cycle, resulting in parts that are extremely smooth, with very little roughness, waviness, or sharm micro-notches.
How isotropic superfinishing works

The process offers a host of advantages over traditional, abrasive-only processes.
In addition to requiring significantly less time to achieve mirror-like finishes, the process is capable of uniformly finishing more complex geometries, and can finish smaller through-holes and more complex internal features than other processes.
Perhaps the most significant benefit, though, is that the process is better able to maintain the geometry of parts - particularly for features like gear teeth - than traditional finishing approaches.
Abrasive Flow Machining (Extrusion Honing)

An interior surface finishing process in which a viscous, abrasive-filled material is forced through a workpiece, abrasive flow machining is used to remove burrs, polish surfaces, form radii and can even remove material from parts.
Typically used in industries ranging from aerospace and automotive to mold, tool and die making and medicine, abrasive flow machining uses a hydraulic ram to drive the media through the part.
That force creates a “file” or “slug” of abrasive material which molds itself precisely to the part, making the process ideal for interior surfaces, slots, holes, cavities, and other areas that may be difficult to reach with other polishing or grinding processes.
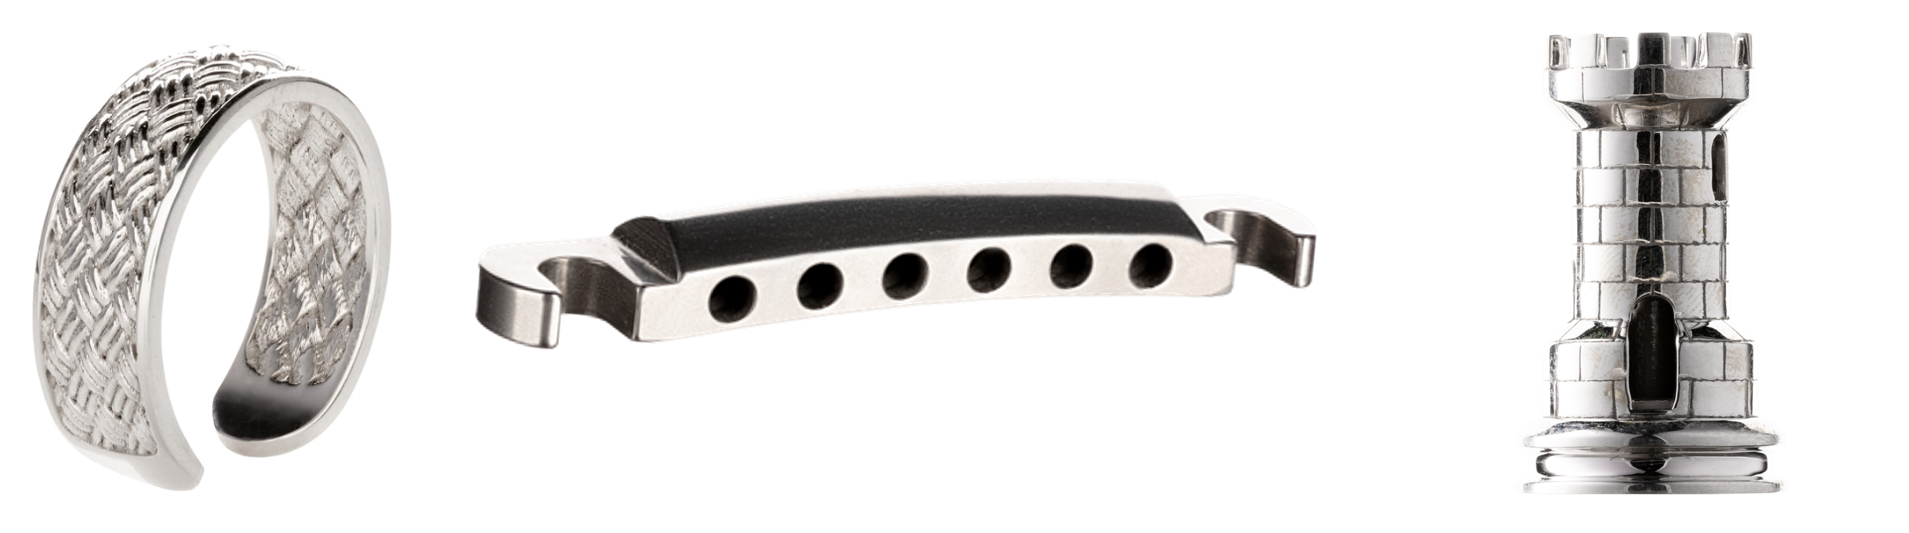
Electroplating and Electropolishing
Though both electroplating and electropolishing use electricity to finish parts, each uses it in different ways.
In electroplating, the current is used to draw positively-charged metal ions dissolved in solution to a negatively-charged part, forming a thin coating over the entire part.
Among the common applications for electroplating are wear and corrosion resistance, electrical conductivity, malleability, solderability and aesthetic considerations.
Desktop Metal parts have been electroplated in a wide range of materials, including gold, silver, chrome, copper, nickel, black nickel, and more.
Often described as the reverse of electroplating, electropolishing uses electric current to remove material from parts.
An ideal solution for polishing irregularly-shaped objects, the process reduces surface roughness, levels micro-peaks and valleys and dramatically improves surface finish.
Machining, Grinding and Electrical Discharge Machining
Among the most common finishing methods for metal parts, machining, grinding and electrical discharge machining (EDM) are widely used to ensure parts meet critical dimension and finish requirements.
While they offer benefits like rapid material removal, extremely tight tolerances and excellent surface finish, each also has challenges, ranging from access to equipment, operator labor and the need for custom jigs and fixtures.
Wire Brushing
Among the least costly solutions for low volume finishing metal 3D printed parts, wire brushing can involve using a handheld brush, drill- or grinder-mounted wire wheel for deburring, edge blending and removing surface imperfections.

Polishing and Buffing
Though similar, polishing and buffing are two distinct processes.
The more aggressive of the two, polishing uses an abrasive that is glued to the work wheel. When working with an unfinished part, polishing begins with a rough abrasive, as low as 60 or 80 grit. Each subsequent step uses finer and finer grits until the desired finish is achieved.
Buffing, by comparison, is less aggressive, and uses a loose abrasive applied to a work wheel to produce a smoother, brighter finish.
To achieve a mirror finish, the two processes are performed in sequence, with polishing and buffing compounds applied to high-speed polishing machines or electric drills.
Conclusion
In addition to allowing users to create parts with highly complex geometries which would be difficult - if not impossible - to create using traditional techniques, metal 3D printing allows for a myriad of finishing options.
Virtually every finishing and post-processing method available for traditionally-manufactured parts can be used on 3D printed parts, resulting in infinite possibilities when it comes to the final look, feel and performance of printed parts.
While those finishing options come with familiar considerations - including part specifications, capital requirements and considerations of per-part costs - those trade-offs in some cases may be mitigated by the benefits of 3D printing.